Install Archcraft With Calamares
This is a simple guide for beginners and linux newbies to install Archcraft on their system, without messing it up. In this guide, I'll be installing Archcraft on an UEFI system. But the process is the same if you are using Legacy BIOS. Follow the steps below to install Archcraft.
I'm assuming that you have already created a bootable USB with Archcraft ISO, boot system with it and select Boot Archcraft. Launch the installer via either welcome app or menu.
Preparation
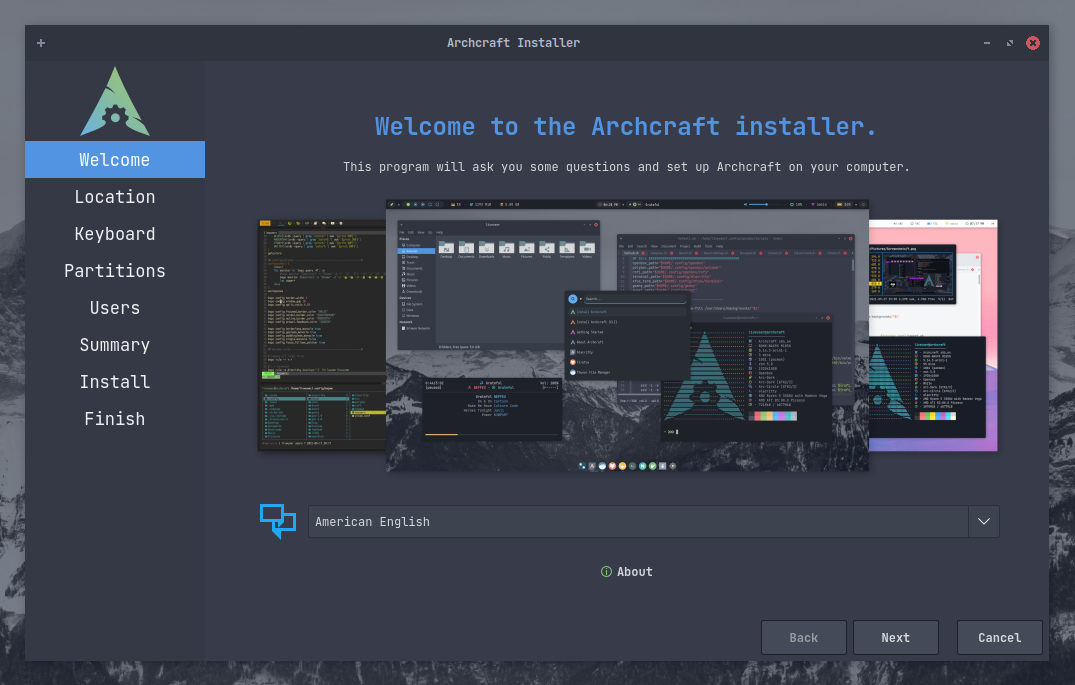
On the welcome screen, Select the installer language and click on Next
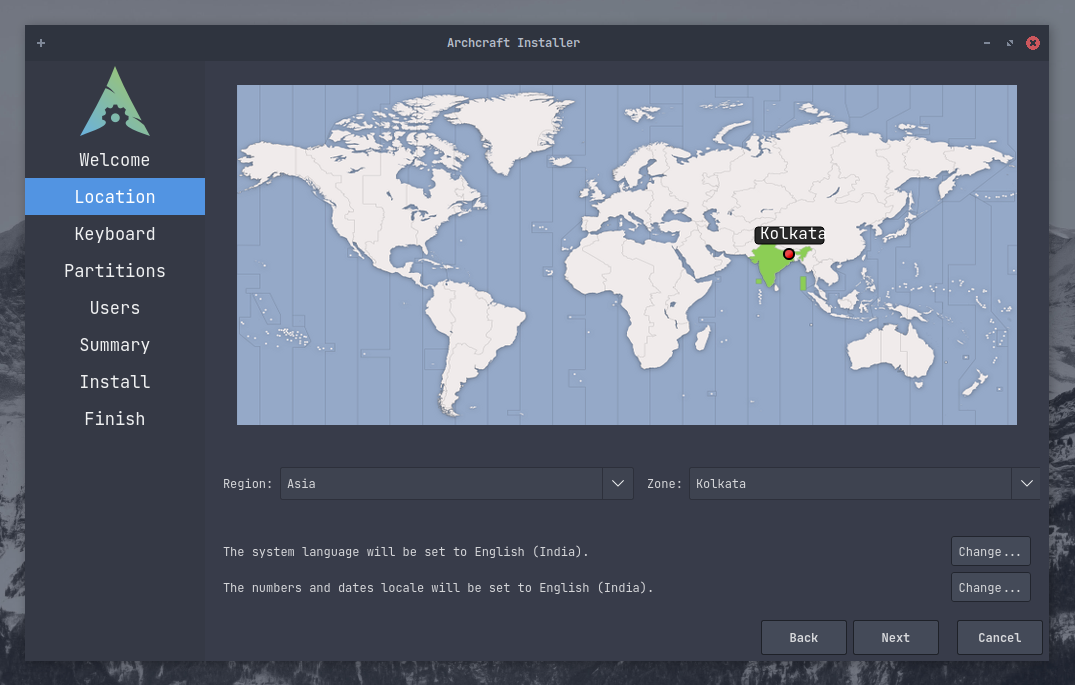
Select your Region, Time Zone, System Locale etc and click on Next If you're connected to the internet, this will be adjusted automatically
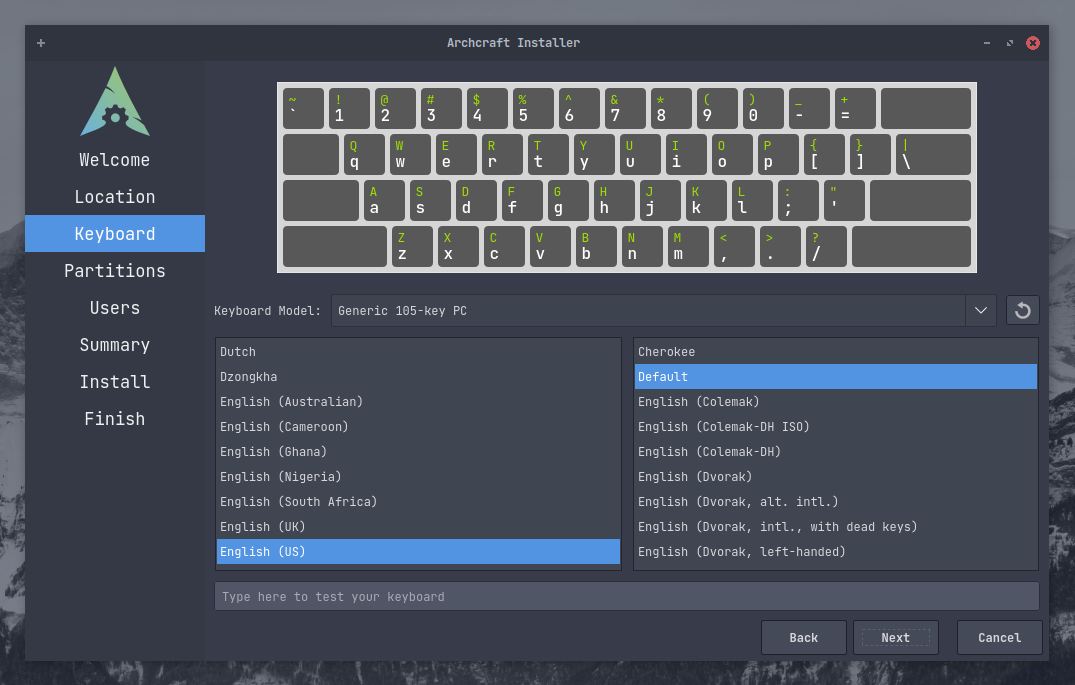
Select your Keyboard Layout and click on Next By default, the keyboard layout is automatically adjusted according to selected system locale
Partitioning
In this guide, All partitioning operations are performed on an empty disk.
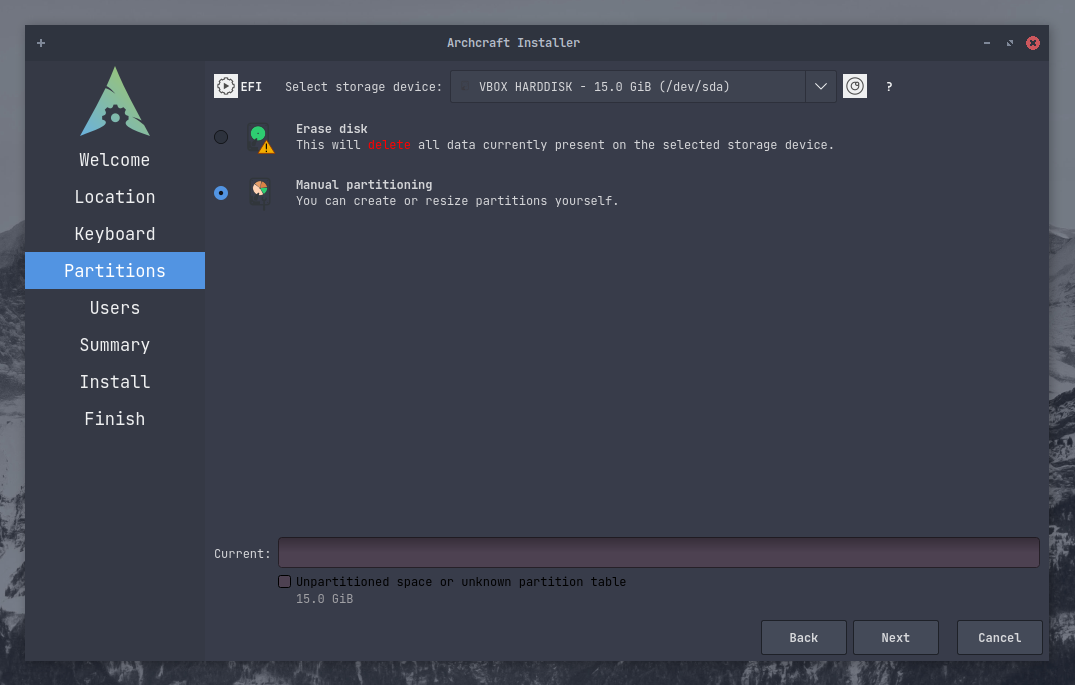
Here comes the scary part where almost every Linux newbie messes things up. So, Be careful what you do here. It is recommended that you read and understand Partition scheme before doing any partitioning on your system.
If you're installing Archcraft on Virtualbox (on a newly created virtual machine), You can just select Erase disk
But on real machine, that's not a great idea (unless you decided to wipe your system completely)
On real hardware, It's better you choose Manual Partitioning and in this guide, we're going to do the same.
Click on that radio button and click on Next
Here, You can see that the disk is completely empty (But in your case you may see a bunch of partitions here).
Let's create a Partition table first. For UEFI, use GPT partition table and for BIOS, use MBR.
You don't need to create a partition table if your disk has partitions already, It's only for empty disks.
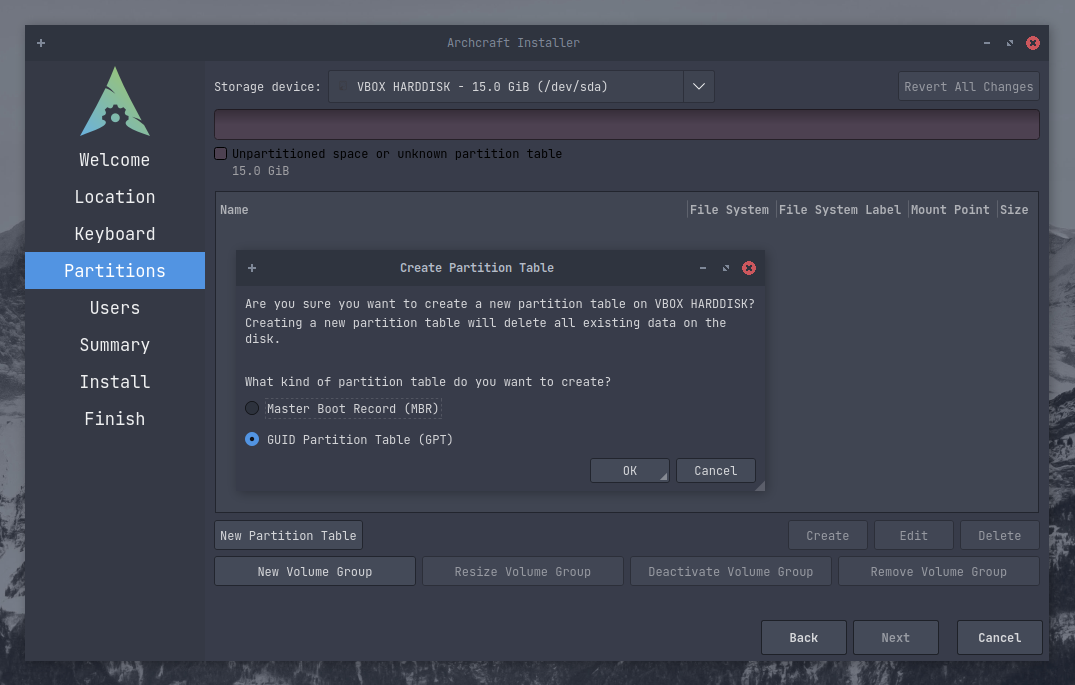
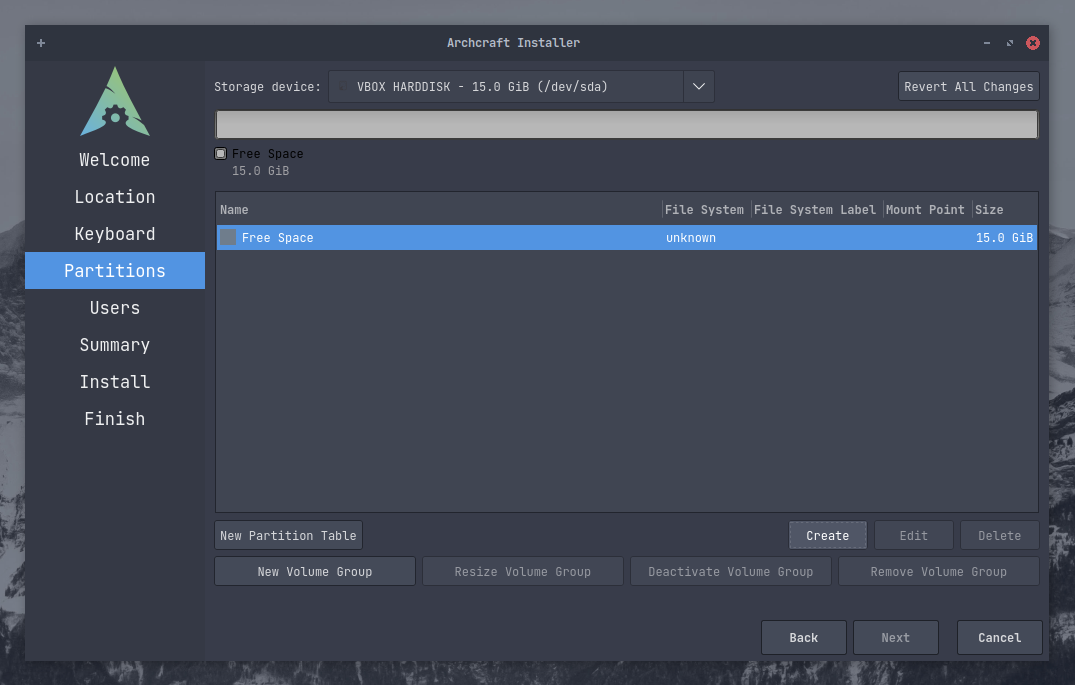
Partition table is created and you can see the Free Space on your disk. Now, Click on Create button to create partitions.
For this installation, We are going to create three partition :
boot: /boot/efiroot: /home: /home
Additionally, you can (You Should) also setup a separate swap partition, I'm skipping that here.
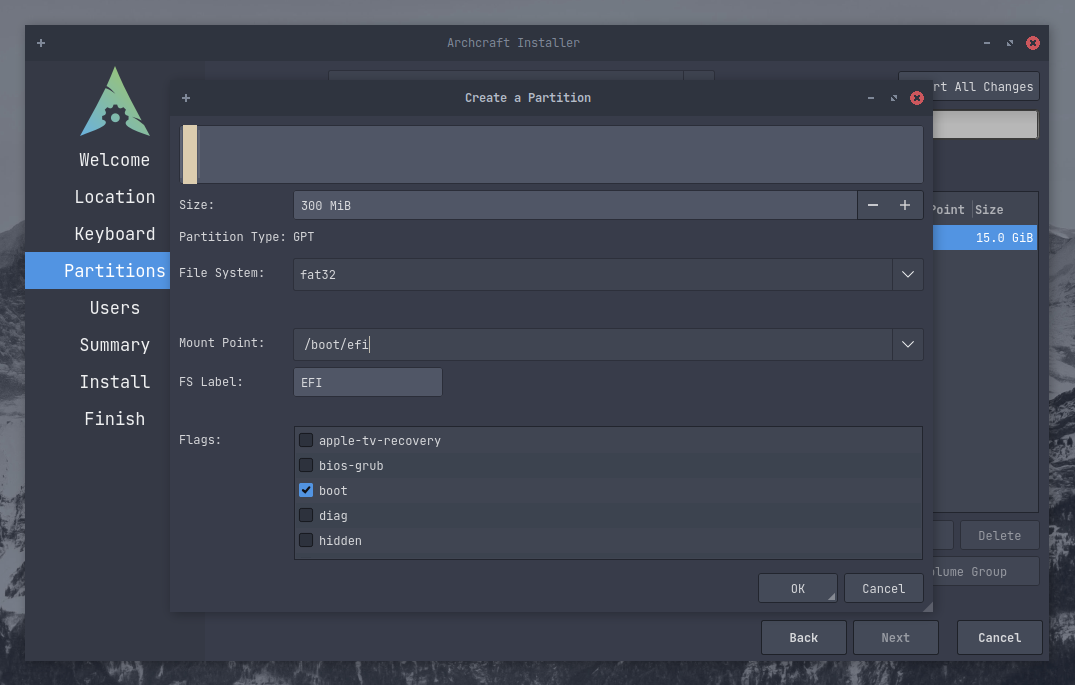
On UEFI systems, a separate partition is needed to boot the system. If you're on BIOS, You can skip creating a separate boot partition.
Your system may already have an EFI partition. In that case DO NOT FORMAT IT or you won't be able to boot into other installed OS (Let's say windows)
Just mount the EFI partition to /boot/efi
Make sure your EFI partition has at least 100MB of free storage, or the installation will fail.
Since in our case, the disk is empty, Let's make an EFI partition. As you can see, I've created a 300MB partition with fat32 file system
and mounted it to /boot/efi and set the boot flag.
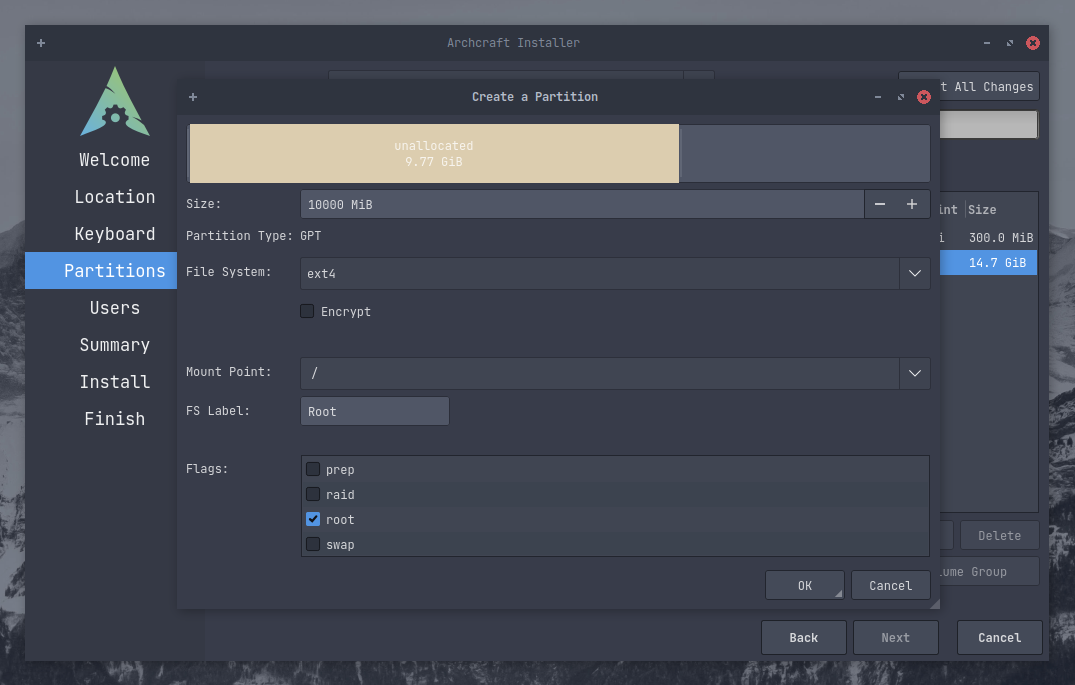
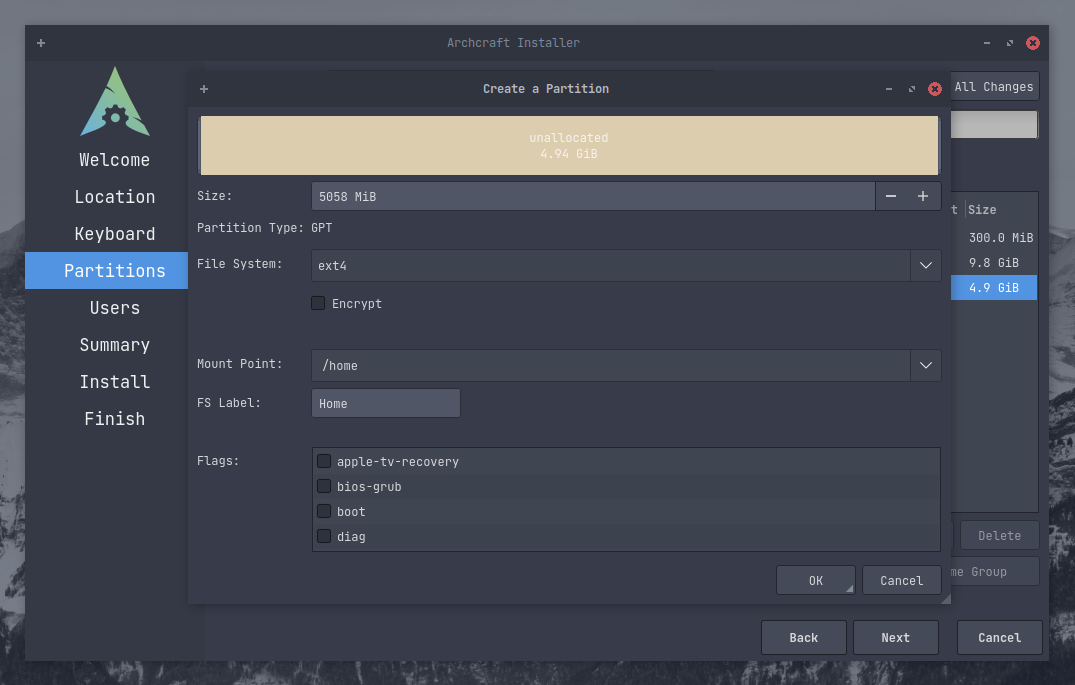
Now create a root partition. Again, Select Free Space and Click on Create.
Select the size of your root partition (make sure it's at least 10GB in size), file system (If you don't care, go with ext4 fs).
Mount it to / and set the flag to root, Optionally you can also set the label for the file system and if you want to use Encryption, Check the Encrypt box and set up a password.
And at last, create a home partition and mount that to /home.
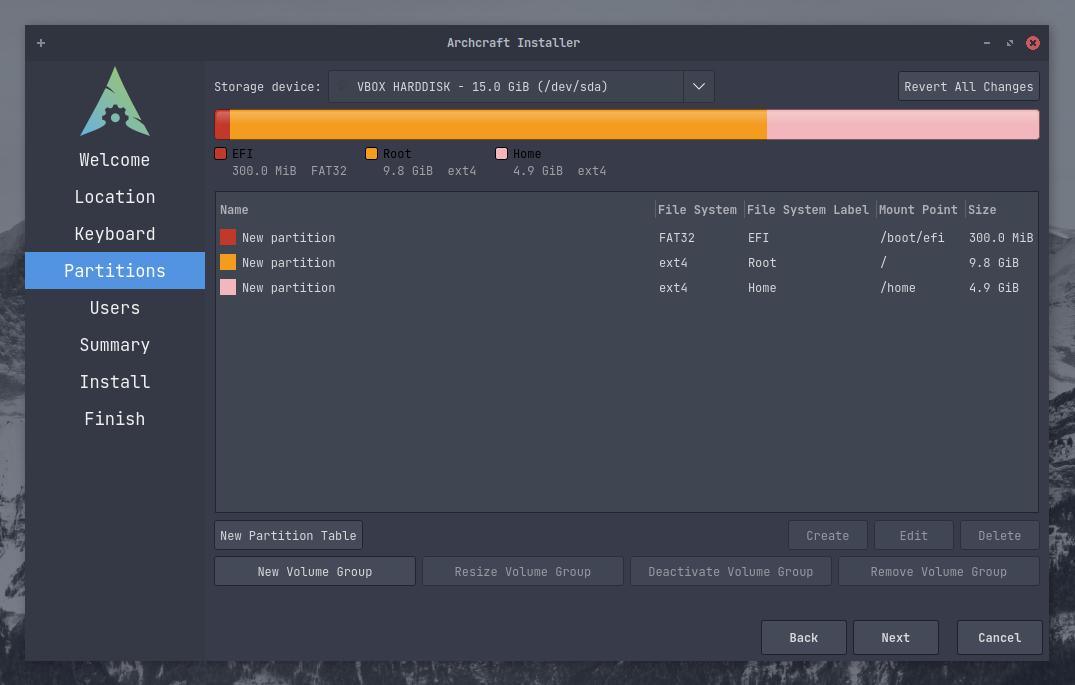
Here's how our partitions look for this installation. When you sure everything is okay, Click on Next
Finalization
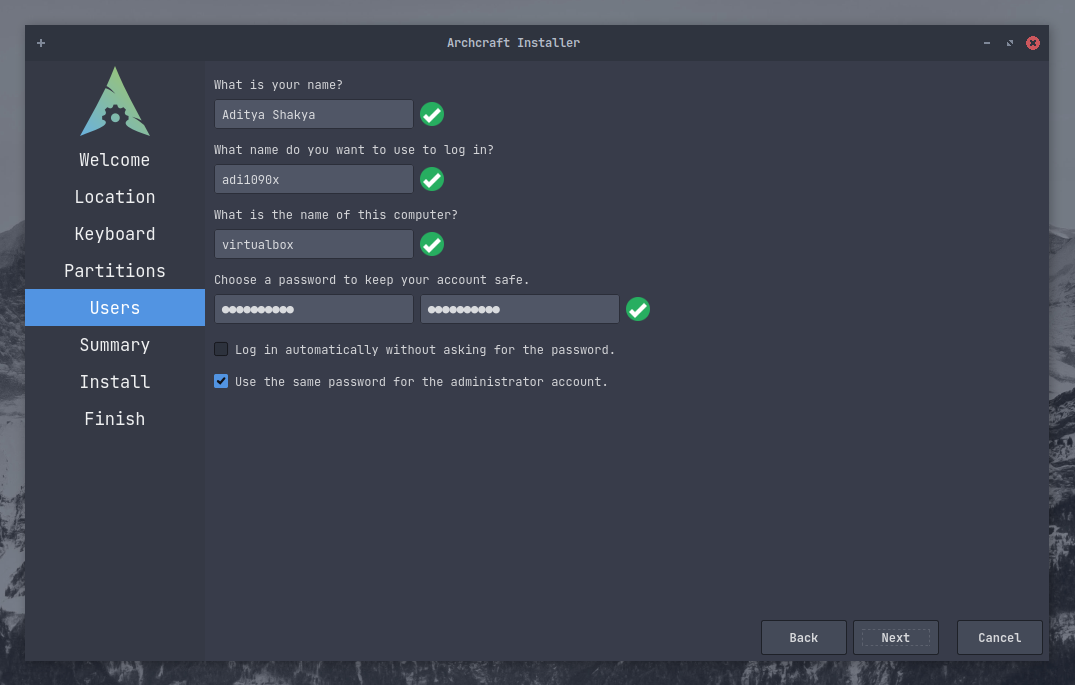
Create a user account for you, this is a simple form, fill it up and click on Next
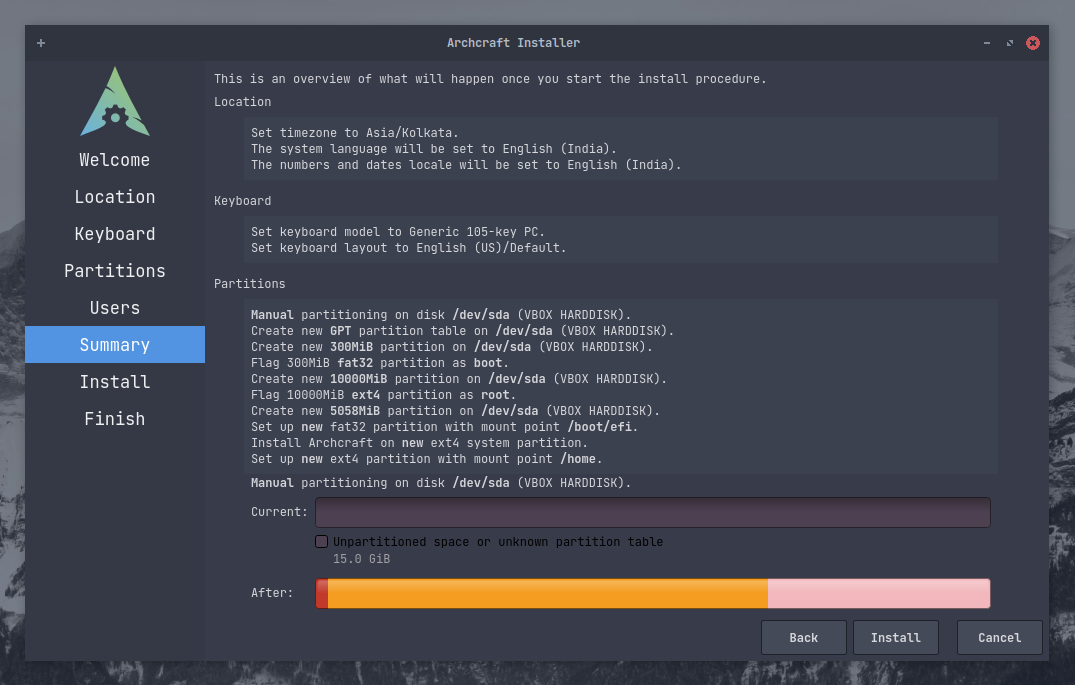
Here's the summary for this installation, Whatever changes you have made and what the installer is going to do now.
Have a look at that and when you're satisfied, click on Next to being the Installation
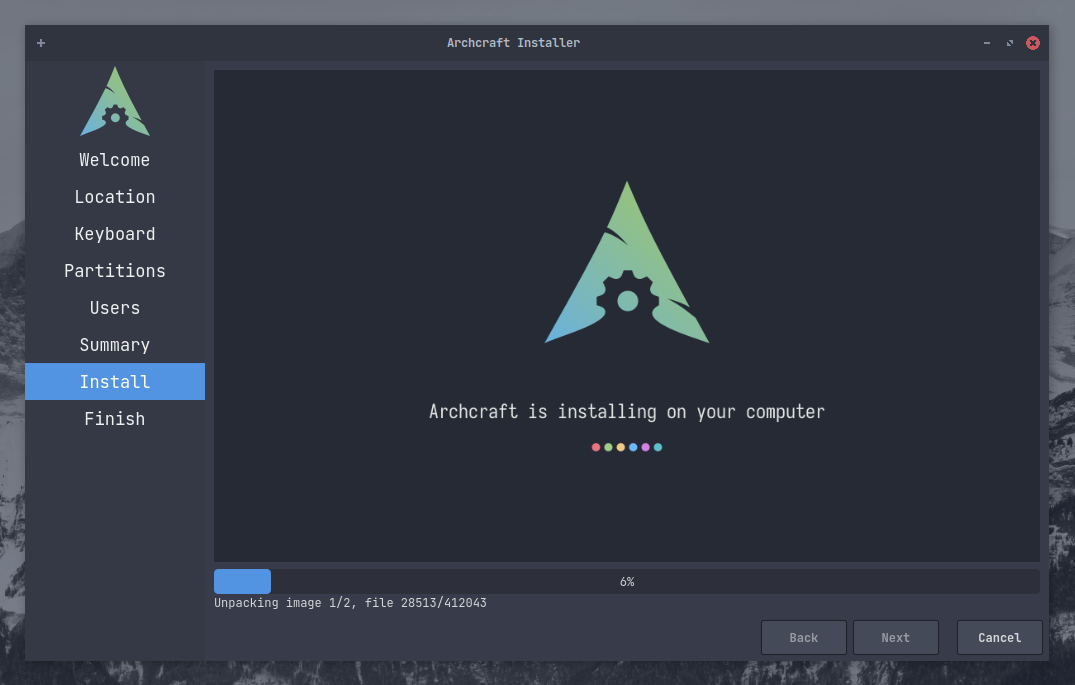
Now, The actual installation begins, It'll take a few minutes so in the meantime you can stare at the slides or... I don't know, go get a coffee or something.
When it's done, Check that Reboot now box to reboot the system instantly.
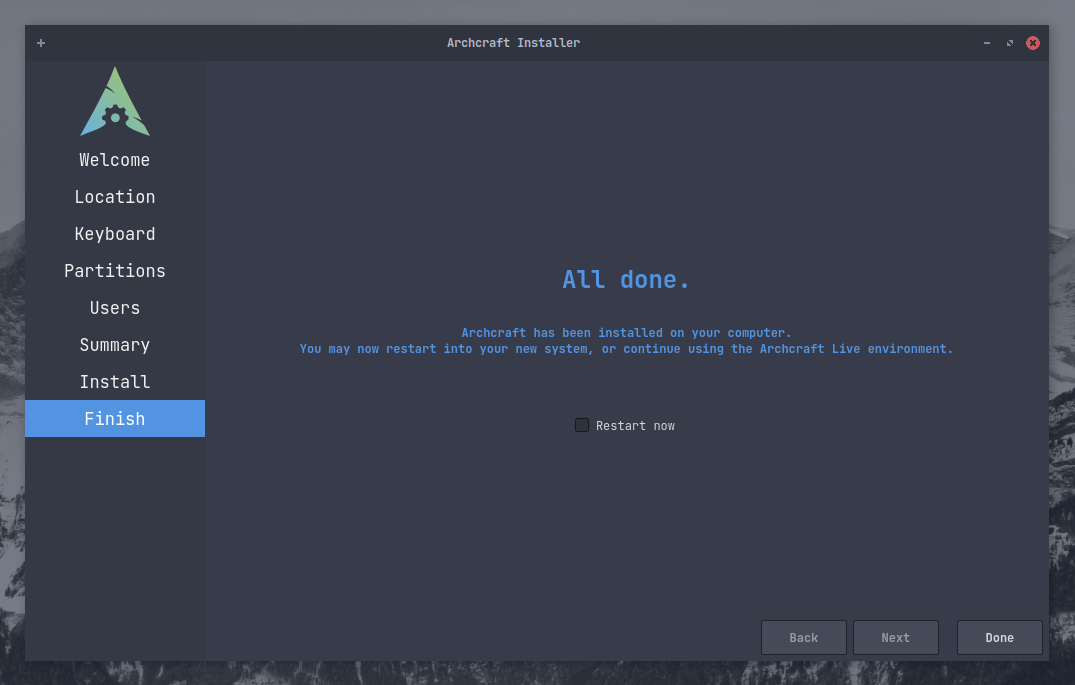
Well, That’s it! Archcraft is installed on your system. Enjoy!